BCT Press Release
Skip Ribbon Commands
Skip to main content
Sign In
{{'GLOBAL_MESSAGE_HEADLINE' | translate}}
{{'GLOBAL_MESSAGE_CHOOSE_LANG' | translate}}
en
日本語
中文
{{'GLOBAL_MESSAGE_OR' | translate}}
{{'GLOBAL_MESSAGE_SET_COUNTRY' | translate}}
{{'ELOQUA_BANNER_DECLINE_CONFIRM' | translate}}
{{'ELOQUA_BANNER_DECLINE_CONFIRM_CLOSE' | translate}}
{{'ELOQUA_BANNER_ACCEPT' | translate}}
{{'ELOQUA_BANNER_DECLINE' | translate}}

How to use Spectra Optia for bone marrow processing

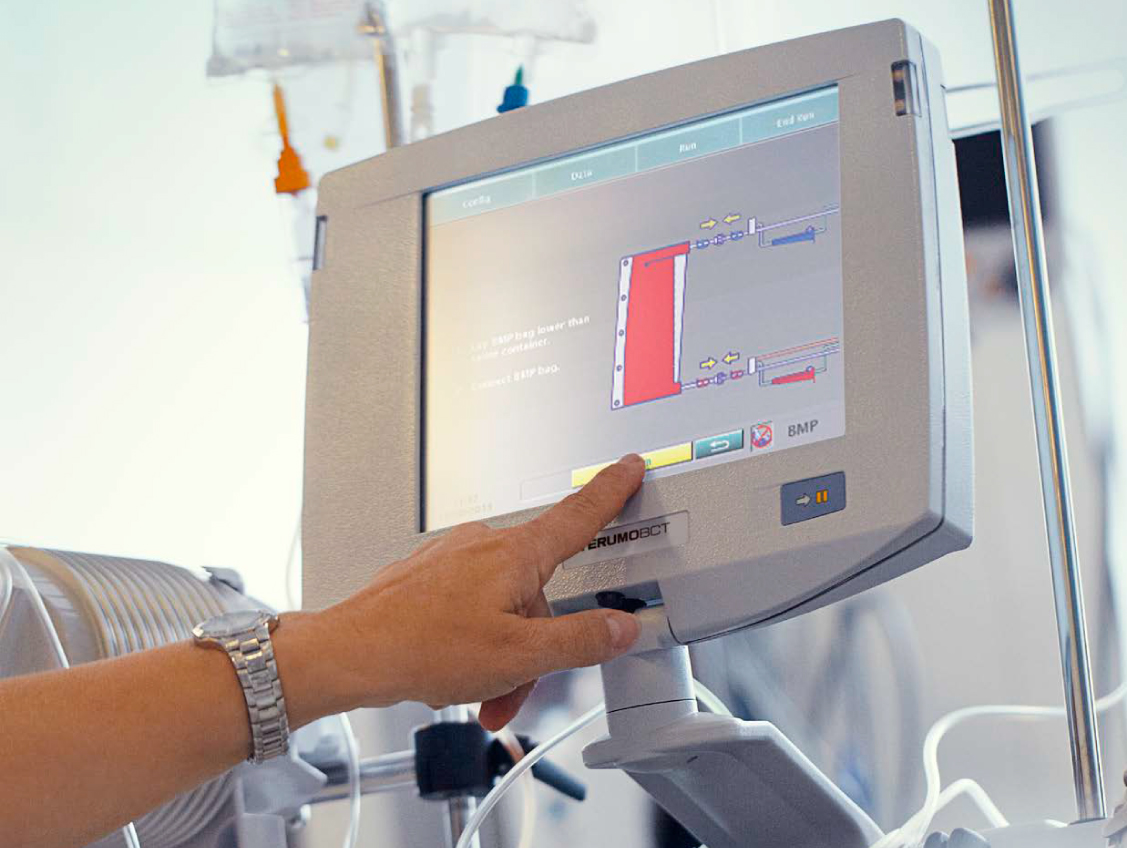
boneMarrowImage.jfif​​


You may know the Spectria OptiaTM Apheresis System best for its role in therapeutic apheresis. But it can also be used for collecting valuable hematopoietic stem cells (HSCs) from a patient’s or donor’s bone marrow. In this article, we provide an overview of the bone marrow processing (BMP) procedure used to collect HSCs and reduce red blood cells in the product prior to infusion.

But first: Can your device perform BMP?
Not all Spectra Optia devices can perform BMP. Review the on-screen list of available procedures on your device to see if BMP is offered. (It is usually listed on the second screen of offered procedures.) If it is not listed on your device, contact your Terumo Blood and Cell Technologies service representative for protocol activation.
 
Preparing for a BMP procedure
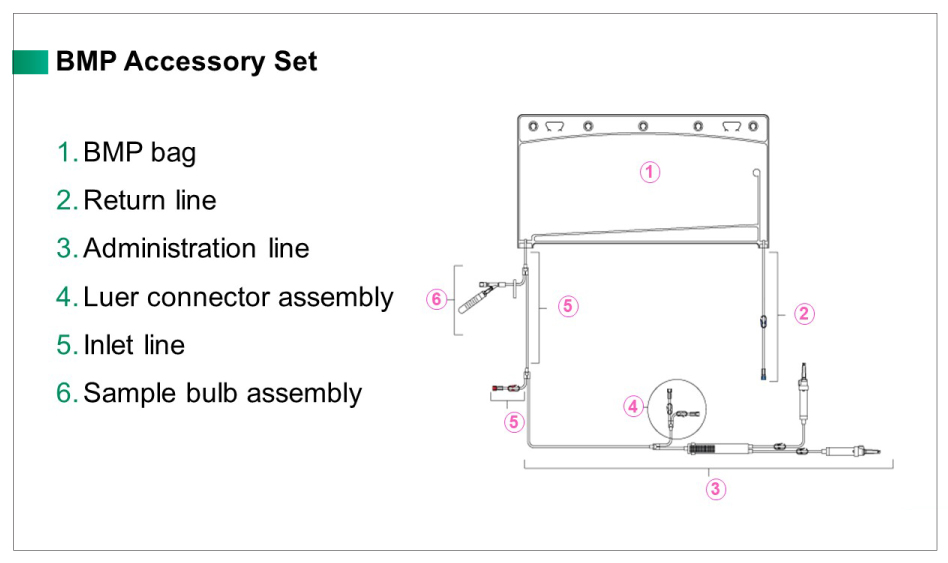
Once you confirm that BMP is listed for your device, gather a Spectra Optia IDL Set, a Spectra Optia BMP Accessory Set (see diagram), and a standard filler. Note that the BMP procedure is the only one that does not use the filler matched to the IDL Set and is the only procedure in which Spectra Optia is not connected to a patient or donor.

boneMarrow_secondImage.jfif

Before starting a BMP procedure, you will need to make sure that the bone marrow (BM) has been filtered to remove any fat or bone fragments. ACD-A must then be added, 10% by volume, to the BM product before processing. The BMP Accessory Set is then connected to the primed IDL Set following instructions on the Spectra Optia screen.
 
Configuring Spectra Optia for BMP
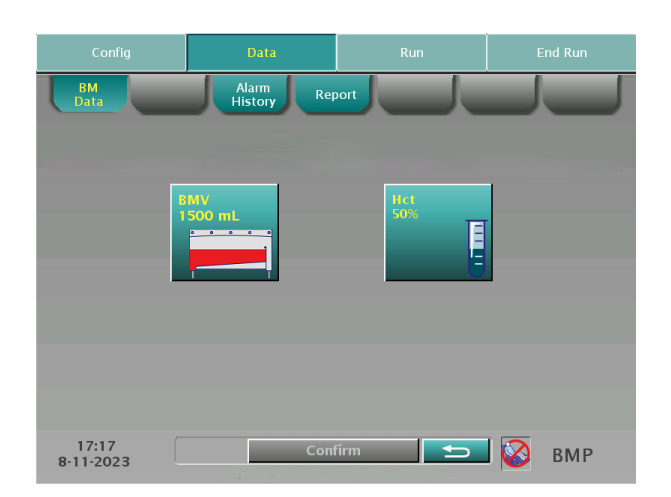
After setting up the equipment, you will enter the BM volume and hematocrit (Hct) numbers into your Spectra Optia device. Be sure to check the Hct after adding the ACD-A.
boneMarrow_thirdImage.jfif

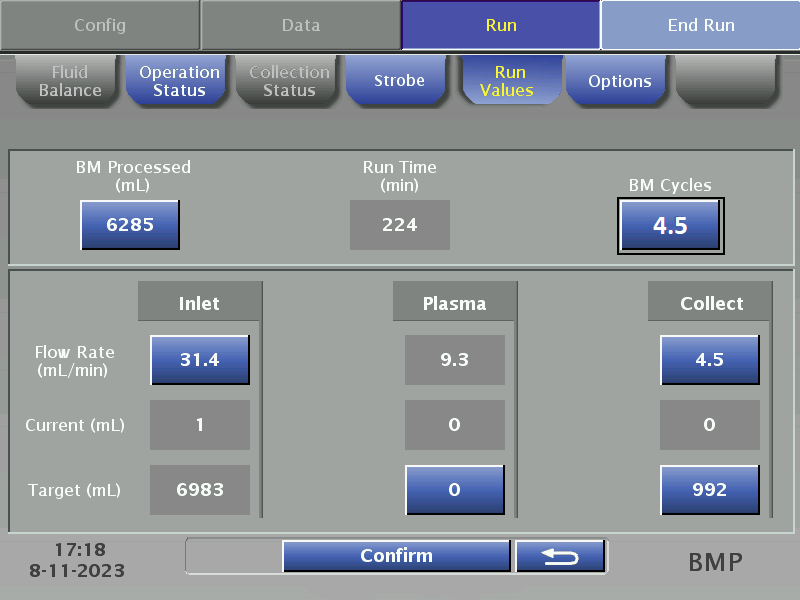
Once the data is confirmed, the run values screen appears, and data may be changed as needed per the facility processing protocol. The number of BM cycles will depend on the volume of red blood cells (RBCs) in the BMP bag but will range from four to 10 cycles.

boneMarrow_fourthImage.png

Monitoring the BMP run
Once the run has started and the interface is established, the collect port image will be displayed on the run screen and the collection status screen. You should monitor the color of the collect line coming from the centrifuge. Use the collection preference tool to target the appropriate color — typically, #4 is targeted for BMP.

boneMarrow_fifthImage.jfif


How the procedure works
During the BMP procedure, bone marrow enters the channel in the centrifuge and separates by specific gravity into plasma, buffy coat, and RBCs. The RBCs flow to the reservoir, then back to the BMP accessory bag, while the plasma is pumped to the reservoir, then either pumped back to the BMP accessory bag or collected if needed. The mononuclear cells are continuously pumped into the collection bag.
 
For additional information on performing a BMP procedure on Spectra Optia, download our BMP procedure training manual and BMP brochure.
 
For specific questions or to schedule training, please reach out to your local account manager or clinical specialist.


Spectra Optia™ is either a registered trademark or trademark of Terumo BCT, Inc. in the United States and/or other countries. See TerumoBCT.com/trademarks for details.

{{'SEARCH_MODAL_TITLE' | translate }}
{{'SEARCH_MODAL_OR' | translate }}

{{'SEARCH_MODAL_BROWSE' | translate }} {{'SEARCH_MODAL_ENLABEL' | translate }}
{{'SEARCH_MODAL_CHOOSE_LANGUAGE' | translate }} {{'SEARCH_MODAL_CHANGE_LANGUAGE' | translate }}
{{$index+1}}. {{s.label}}